Should You Put a Camera Protector on iPhone: A Practical Guide
Learn when and how to use a camera protector on iPhone, compare glass vs film options, and install tips for lens protection without hurting photo quality.

A camera protector for iPhone is a thin, clear layer designed to shield the camera lens from scratches, dust, and impact. Should you use one? Generally yes if you routinely carry your phone in pockets or bags, use rough surfaces, or want to minimize scratch risk. Evaluate lens coverage, optical clarity, compatibility with your iPhone model, and how it affects cases and cleaning.
Why you might want to protect your iPhone camera with a protector
If you take photos regularly on the go, you may wonder should you put camera protector on iphone. According to Best Camera Tips, a purpose-built lens protector can reduce micro-scratches, keep moisture out of seams, and preserve resale value, especially when you carry your phone in pockets or cluttered bags. A protector also guards against dust that can accumulate in camera housing during travel. The decision isn’t purely cosmetic: scratches on the lens can scatter light, reduce sharpness, and introduce flare in backlit scenes. For many everyday shooters and professionals who rely on mobile photography, the added security is worthwhile. Still, a protector isn’t a silver bullet; it won’t prevent all damage, and it may affect focus or clarity if the fit is poor or the coating isn’t designed for your model. In this guide, we’ll explore when to use one, how to choose, and how to install it with confidence on iPhone models through 2026.
length":null}
Types of camera protectors and how they differ
Camera protectors come in several forms, each with trade-offs. The two most common are tempered-glass protectors designed for the camera glass and thin PET or polyurethane films that cover the lens area. Tempered glass offers strong scratch resistance and maintains optical clarity when properly matched to your iPhone model; films are cheaper and more forgiving on edge alignment but may be more prone to micro-scratches over time. Some protectors are single-lens focused, while others provide a full-coverage shield for multiple lenses or the entire camera module. Coatings vary as well—anti-fingerprint, anti-reflective, or hydrophobic finishes can affect image quality, particularly in bright sun. When you compare options, pay attention to edge design: edge-bonded protectors should sit flush with the camera housing to avoid vignetting or reflections. Finally, verify compatibility with your case; a bulky protector can interfere with certain cases or MagSafe accessories. As you weigh choices, consider your shooting style, storage habits, and how often you upgrade devices.
length":null}
Do protectors impact image quality or autofocus
A protector that fits perfectly should minimize impact on autofocus and image quality, but a misfit can introduce tiny distortions. Thick or poorly rounded edges can cause slight vignetting or softening at the extreme corners of ultra-wide shots. Some coatings can affect color rendering or introduce subtle flare in strong backlight unless the coating is designed for camera use. In practice, high-quality protectors engineered for iPhone cameras preserve sharpness and color while reducing the risk of micro-scratches and dust intrusion. If you notice a decrease in sharpness after installation, recheck alignment and ensure the protector is not lifting at any edge. In many cases, the difference is negligible for everyday scenes, while professionals may prefer glass protectors with precise cutouts and coatings optimized for performance. Regular testing with a few test shots in diverse lighting can help you quantify any small changes.
length":null}
Compatibility considerations with iPhone models and cases
Every iPhone model has slightly different lens geometry and housing dimensions, which means not all protectors fit all phones. Check the product’s compatibility chart for your exact model (for example, iPhone 13 Pro vs. iPhone 14 Pro) and confirm the protector aligns with all lenses and the TrueDepth camera. Case compatibility matters too: some rugged or bulky cases can crowd the lens area, causing misalignment or edge gaps. If you use a magnetic or wireless charging accessory, verify that the protector does not interfere with the magnet array or coil clearance. For users with multiple devices, keep a notes file of model numbers and protector brands to ensure correct replacements in the future. By prioritizing model-specific fit and case compatibility, you reduce the risk of tilt, air gaps, or glare during photos.
length":null}
Pros and cons of using a camera protector
Pros include reduced risk of lens scratches from pocket debris or accidental drops, easier maintenance since surface dust is captured on the protector, and preserved resale value thanks to a pristine lens surface. Cons can involve slight image-quality trade-offs if the protector is not properly matched, potential edge lifting in tight case setups, and the need for careful cleaning to avoid trapped dust. The best approach is to match a high-quality protector to your iPhone model and your daily workflow, then test with multiple lighting conditions. If you frequently shoot in sun or use long-exposure night scenes, you may prefer models with anti-reflective coatings and precise lens cutouts. For most casual shooters who want minimal risk and maximum convenience, a well-fitted protector offers more upside than downside.
length":null}
How to choose the right protector for your iPhone
When selecting a protector, prioritize model-specific fit, matte vs gloss coatings, and edge-to-edge coverage. Thicker options around 0.2–0.3 mm are common and rarely affect optics on modern sensors, but extremely thick films can impact autofocus in some setups. Look for protectors with strong adherence to the lens surface, clean-cut edges, and a coating that resists fingerprint smudges and water marks. If you shoot with a micro four-thirds or higher-diameter lens accessory, ensure that the protector’s cutouts won’t crowd adjacent components. Read user reviews focusing on optical performance and durability in real-world use. Finally, consider a trial period with easy return options in case you notice unwanted glare, softening, or case incompatibility. This will help you answer the question should you put camera protector on iphone with confidence for your specific device and usage patterns.
length":null}
Installation basics and best practices
Installation fundamentals matter as much as the protector quality. Start in a clean, dust-free environment and wash your hands. Remove the case only if the protector requires unobstructed access. Use a microfiber cloth, alcohol wipe, and dust removal sticker to prepare the lens surface. Align the protector using the kit’s frame or your device’s lens alignment marks, then apply gradually from one edge to the opposite side to minimize air bubbles. If a raise occurs along the edge, gently re-seat with a soft card. After application, inspect for dust or misalignment and wipe with a lint-free cloth. Allow any adhesive layer to set for a few minutes before using the camera aggressively. A patient, methodical approach yields the best results and helps maintain lens integrity.
length":null}
Maintenance and care to maximize lifespan
Keep the protector clean with a microfiber cloth and a gentle lens-cleaning solution when needed. Avoid harsh solvents or abrasive pads that can scratch the surface and degrade coatings. If you notice small chips or delamination, replace the protector promptly to prevent further damage. Store spare protectors in their packaging to avoid dust exposure and ensure they stay pristine before next installation. Regular inspection after heavy use or after dropping the phone can prevent surprises during important shoots. By integrating routine maintenance into your photography workflow, you’ll extend the life of both the protector and your iPhone camera lens.
length":null}
Common myths debunked and real-world tips
A common myth is that protectors completely prevent lens damage in all scenarios. While protectors reduce the chance of scratches and some impact, they cannot stop a direct impact from a hard object or a significant drop. Real-world tip: pair a protector with careful handling and a protective case that offers edge protection, and perform periodic checks to ensure the protector remains properly seated. Another myth is that all protectors are interchangeable across models; compatibility varies by lens layout, thickness, and coatings. Always verify model-specific compatibility, read reviews from users with the same iPhone model, and consider a trial period to determine whether the protector meets your expectations in real-world photography and daily use.
Tools & Materials
- Microfiber cleaning cloth(lint-free, used to wipe the lens surface before applying protector)
- Isopropyl alcohol wipes (70%+)(for quick lens cleaning and debris removal)
- Dust removal sticker or adhesive roller(to lift dust from the lens surface before apply)
- Camera protector kit (tempered glass or PET film)(model-specific fit; includes lens-cutout and guide frame if possible)
- Alignment frame or guide sticker(helps center protector over the lens area)
- Lint-free gloves (optional)(reduces fingerprint transfer during installation)
- Soft card or squeegee(to smooth out air bubbles and ensure adhesion)
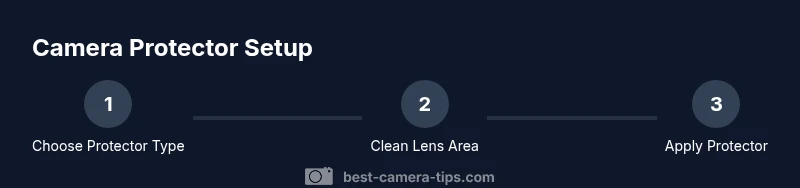
Steps
Estimated time: 20-30 minutes
- 1
Prepare your workspace and gather tools
Set up a clean, dust-free area. Gather your microfiber cloth, alcohol wipes, dust removal sticker, alignment frame, and camera protector kit. This ensures you won’t have to search mid-application and reduces the risk of dust contamination.
Tip: Wash hands and avoid touching the lens surface with bare fingers to minimize fingerprints. - 2
Clean the lens and dry surface
Use the alcohol wipe to thoroughly clean the lens area, then dry with the microfiber cloth. Ensure no moisture or streaks remain before proceeding. A dry surface helps the protector adhere evenly and reduces micro-bubbles.
Tip: Wait 30 seconds for any residual moisture to evaporate before continuing. - 3
Remove dust and test fit
Place the dust removal sticker on the lens surface to lift any remaining particles. Do a dry fit of the protector using the alignment frame to confirm the center and edge clearance.
Tip: If you see dust while testing fit, remove the protector and re-clean the lens before re-testing. - 4
Align the protector precisely
Position the protector using the frame or guides to match the camera cutouts. Ensure the edges are flush with the housing and there’s no tilt that could cause glare or misalignment.
Tip: Use a single-handed, steady motion to avoid shifting the protector during placement. - 5
Apply the protector slowly
Begin applying from one edge toward the opposite side, pressing gently with a soft card to push out air bubbles. Keep consistent pressure and avoid sudden movements that create creases.
Tip: If a bubble remains, gently lift the edge closest to it and re-press to re-seat. - 6
Seal edges and finalize
Once fully pressed, inspect edges for gaps and wipe away any fingerprints. Let the adhesive set for a couple of minutes before exposing to normal use.
Tip: Avoid heavy rubbing on the lens immediately after application. - 7
Test camera function
Take a few photos in different lighting to verify sharpness, color, and autofocus. Look for any distortion at the edges or unusual reflections.
Tip: If autofocus feels off, re-check alignment and edge seating. - 8
Clean up and store unused protectors
Carefully reseal the kit, store extra protectors in their protective pouch, and dispose of used materials responsibly.
Tip: Keep a spare protector handy for future device upgrades. - 9
Document results and plan maintenance
Note the model, protector brand, and installation date for future reference. Schedule periodic checks to ensure continued protection and optical quality.
Tip: Set a reminder to inspect every 2–3 months or after heavy use.
Common Questions
Should I use a camera protector on iPhone?
Yes. A lens protector can reduce scratches and dust intrusion, preserving image quality over time. Choose a model that fits your iPhone precisely and doesn’t interfere with your case or accessories.
Yes, a camera protector can help prevent scratches and dust; choose a model that fits your iPhone and works with your case.
Will protectors affect photo quality?
A well-fitted protector designed for your iPhone model should minimize impact on sharpness and color. If the fit is off, you may notice slight edge distortions or glare in bright light.
If properly fitted, it should barely affect photo quality; a poor fit can cause glare or slight softness.
Glass vs film which is better?
Glass protectors generally offer better scratch resistance and optical clarity, but films are cheaper and thinner. Your choice depends on how you use the phone and whether you prioritize cost over durability.
Glass is usually better for durability and clarity; film is cheaper but may show more wear over time.
Can I install with my case on?
Many protectors require removing the case for perfect alignment, but some are designed to work with popular cases. Check the product specs and customer feedback before installation.
Some cases fit; others require removing the case temporarily for precise alignment.
How do I remove a damaged protector?
Carefully peel from one edge with a steady hand, avoiding contact with the lens. If adhesive remains, clean gently and replace with a fresh protector.
Gently lift one edge and peel slowly; clean and reapply a new protector if needed.
Do protectors block telephoto or autofocus?
A properly cut protector should not block the telephoto lens or autofocus; ensure the protector’s cutouts align with all lenses. If you notice focus issues, recheck alignment.
If the protector is well-cut, it won’t block those functions.
Watch Video
The Essentials
- Protect with purpose: choose a model-specific protector for iPhone you own
- Prioritize clean, dust-free preparation to avoid bubbles
- Test photos to verify no degradation in sharpness or color
- Follow step-by-step alignment to ensure full coverage and ease of use